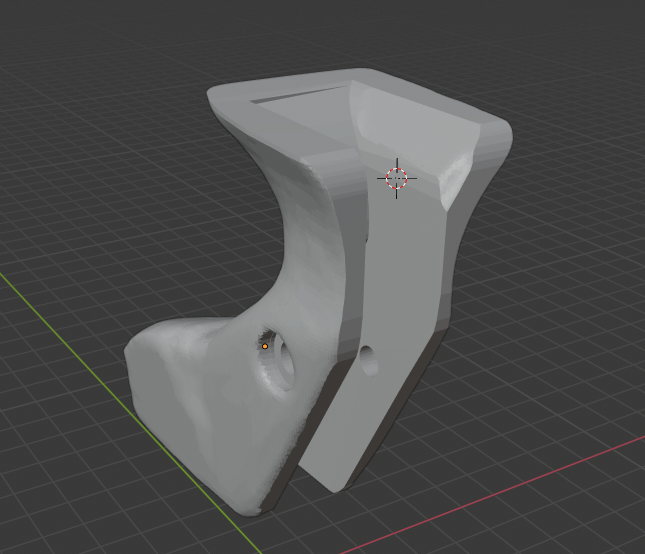
Photogrammetry and custom bow grip
Since I had some time this week, I decided to try to improve my bow grip using a 3D printer and the already customized bow grip that we worked on at the club some months ago.
The first steps were trial and error, by applying some 2 components paste on the grip, shoot some arrows, check that the hand was positioned correctly, add some paste, repeat until the hand was positioned correctly and comfortable.
I wanted to scan the result, post-process it a little using a 3D software and print the improved result to compare and also allow additional tests without risking destroying the bow grip we worked so hard on.
Scanning an object into a 3D object can be done without any special hardware using only a camera and some software on your computer. Depending on your computer, some software will be unavailable or really slow.
Since my computer has an AMD Radeon card, software using CUDA will not be available and I will have to rely on CPU computations. This slows down the processing but also means that it should work on any computer without any special hardware required.
Photogrammetry is a technology that interprets photographic images of an object to extract and compute properties of the object. In this project, I used what is called stereophotogrammetry to reconstruct a 3D model of my bow grip using photographic images taken from different points of view. The principle is simple, the software extracts features from the images by looking at high contrast areas, matches these features across the different images to see how they move and based on the relative position of the features in the different images, computes the position of the camera and the distance of the feature. Once it has build a points cloud, it matches the image pixel with the point, tries to guess how the surface of the object should be between the points and rebuild the object.
Let’s see what we need to begin.
Prerequisites
As long as the hardware prerequisites go, only a computer, a camera and the custom bow grip are required. A white tablecloth or sheet is also useful to reduce the background that would be captured by the camera and thus speed up the processing.
Since we have to take pictures of the object under every possible angle, to speed up the scan and allow me to focus on pointing the camera on my object, I also build a small Lego contraption to rotate the object automatically.
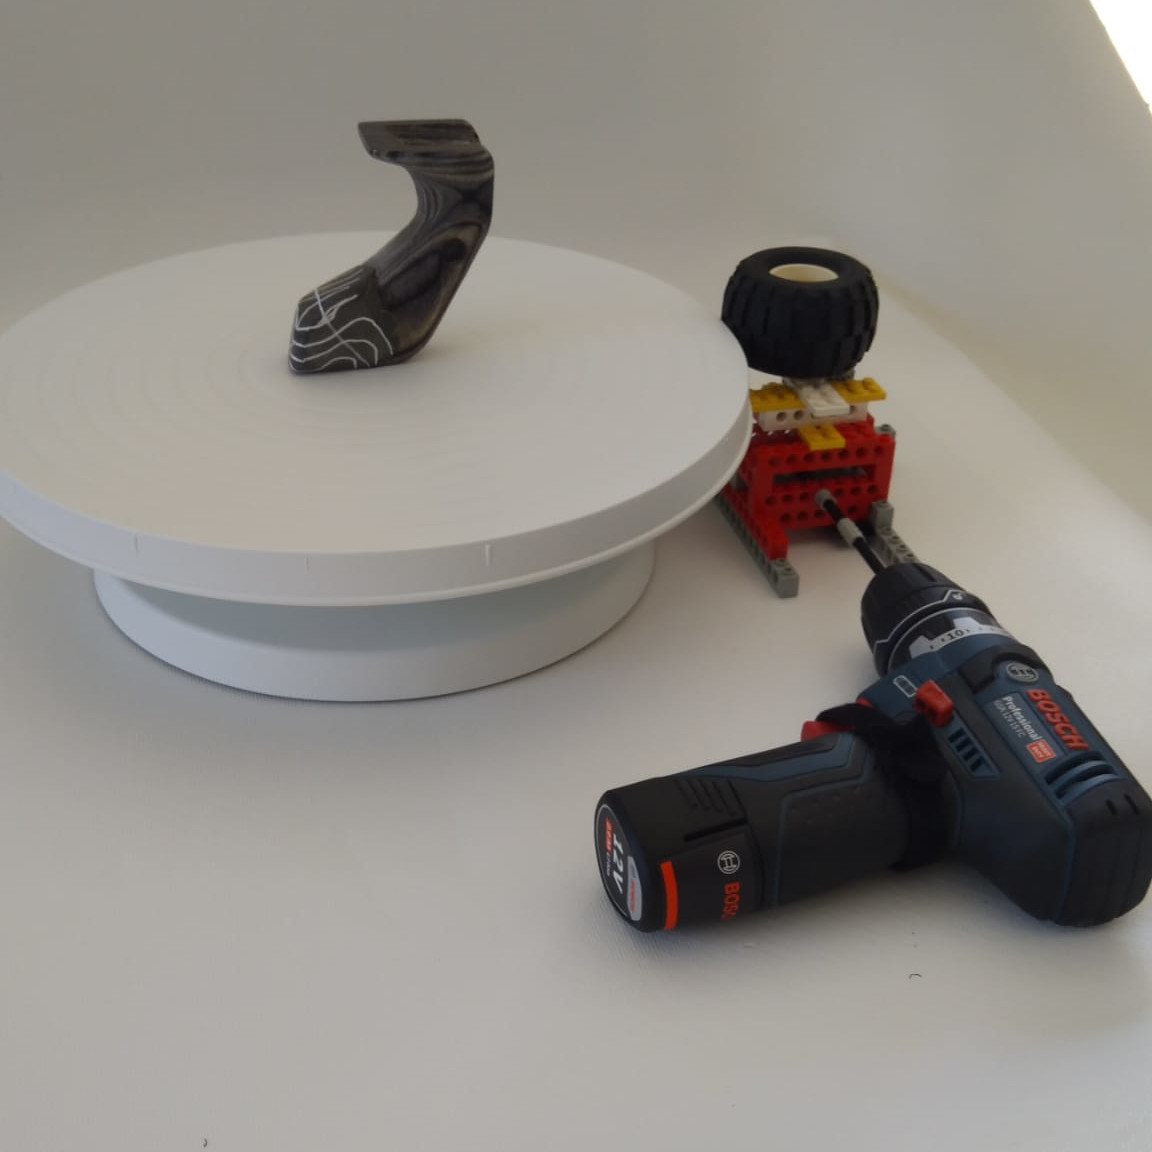
On the software side, I used ffmpeg to convert a video into separate images,
imagemagick to bulk crop the result, colmap to extract the features from
the images and build the sparse point cloud, openMVS to build the dense
point cloud and build the surface model and then blender to clean up the
model and do the modifications I wanted to try.
If you are using Debian, you can install 4 of them using apt:
$ sudo apt install ffmpeg blender colmap imagemagick
We will need to build openMVS from source. Since there are dependencies
to build it, I decided to use a Docker container and retrieve the executables.
$ docker run -ti debian:testing /bin/bash
(CID) # apt-get update
(CID) # apt-get install -qq -y build-essential git cmake
         libpng-dev libjpeg-dev libtiff-dev libglu1-mesa-dev libxmu-dev libxi-dev
         libboost-iostreams-dev libboost-program-options-dev libboost-system-dev libboost-serialization-dev
         libopencv-dev libcgal-dev libcgal-qt5-dev libatlas-base-dev
         freeglut3-dev libglew-dev libglfw3-dev
(CID) # git clone --single-branch --branch 3.2 https://gitlab.com/libeigen/eigen.git
(CID) # cd eigen/
(CID) # mkdir t_build
(CID) # cd t_build/
(CID) # cmake ..
(CID) # make -j8
(CID) # make install
(CID) # cd /
(CID) # git clone https://github.com/cdcseacave/VCG.git
(CID) # git clone https://github.com/cdcseacave/openMVS.git
(CID) # cd openMVS/
(CID) # mkdir t_build
(CID) # cd t_build/
(CID) # cmake -DCMAKE_BUILD_TYPE=Release -DVCG_ROOT="/VCG" ..
(CID) # make -j8
(CID) # exit
$ docker cp ${CID}:/openMVS/t_build/bin .
These commands will start a Docker container based on the latest Debian
Testing, install the required packages, build the dependencies, build OpenMVS
and copy the result of the build into a bin folder in the current directory.
Once the different programs are installed, we can start taking pictures.
Taking pictures
For this step, I used my smartphone to record a video of the rotating object, focusing on keeping the object in the center of the screen and moving the smartphone up and down to record the object at 3 or 4 different heights.
If your object has some mate and uniform parts, cover them with tape or write on these parts with some washable pen so that the software can detect and match features on these parts as well, improving the result.
Once the video looks good, we can transfer the video from the smartphone onto the computer. For this, we will create a project folder
mkdir -p custom_bowgrip/images custom_bowgrip/images_raw custom_bowgrip/video custom_bowgrip/models
Transfer the video into the video directory.
ffmpeg -i video/*.mp4 -r 4 images_raw/img_%05d.png
Change the -r number of frame per second to get around 400 images. More
than that will slow the processing without improving the result much. The
quality of these images is more important than the quantity.
We want to remove as much as possible of the images, so to process the object
and remove useless processing on the background, we will crop the image square
(as our object is mostly square). If you were static enough during the filming,
you can mass-crop the images using ImageMagick’s convert.
Open the image in Gimp (or any other tool that will allow you to preview
the image and crop it). In Gimp, do a Image -> Resize canvas. Resize the image
to contain the object and allow breathing room for movements. Note the coordinates
of the offset. These will be passed to convert to mass-crop the images.
$ cd images_raw
$ for i in *; do echo $i; convert $i -crop 1080x1080+440+0 ../images/$i; done;
$ cd ..
We should now have the following structure:
├── images
│   ├── img_00001.png
│   ├── ...
├── images_raw
│   ├── img_00001.png
│   ├── ...
├── models
└── video
    └── VID_20200415_103955.mp4
Check that the cropped images are correct and centered on the object before continuing.
Reconstruction
The first step of the reconstruction uses COLMAP. Start the gui with
colmap gui and create a new project with a new database and using our
clean images directory. Save this new project in our project directory.
You should have the following structure:
├── custom_bowgrip.db
├── custom_bowgrip.ini
├── images
│   ├── img_00001.png
│   ├── ...
├── images_raw
│   ├── img_00001.png
│   ├── ...
├── models
└── video
    └── VID_20200415_103955.mp4
We can now start the first step in COLMAP: The feature extraction. In the
processing menu, select Feature extraction. We can tick the Shared for all images in the camera model option and untick use_gpu in the
Extract options.
This step should task less than a minute to extract features from the images and it should find around 2000 features per image.
Once the extraction is done, we can check the quality of the features in
processing -> Database management. Select an image and click Show image.
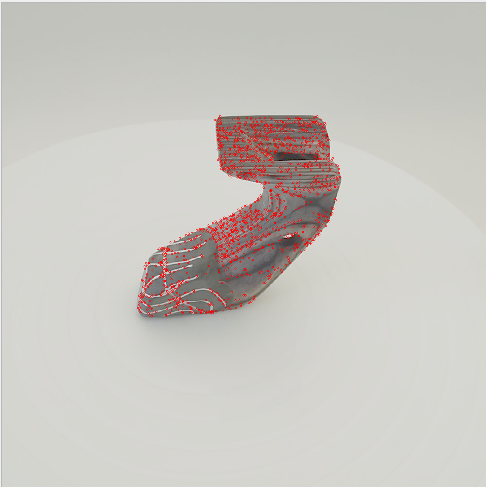
An image should have most of the features on the object you want to reconstruct, not on the background. If your background is targeted by lots of features, the matching and reconstruction later will spend a lot of time on reconstructing the background of your scan and not the object.
Once we know that the features are centered on our object, we can continue
onto the next stage: Feature matching. In the Processing menu, select
Feature matching.
As we captured the images from a video, we can use the Sequential matching
algorithm. This is quicker as the program knows that the images were taken
sequentially and thus looks for features in the previous and following images
instead of doing an exhaustive search. It also tries to detect loops and
match images taking these loops into account. As before, we want to untick
use_gpu in the options before running the operation.
This step should take around 5 minutes to match the features in our images.
Once the matching is done, we can check the quality using the
Processing -> Database management tool again.
Selecting an image and clicking on the Overlapping images button,
we can see the images overlapping the selected image. If you select one
image and click on Show Matches, you should get a number of red feature
dots and of green matching lines.
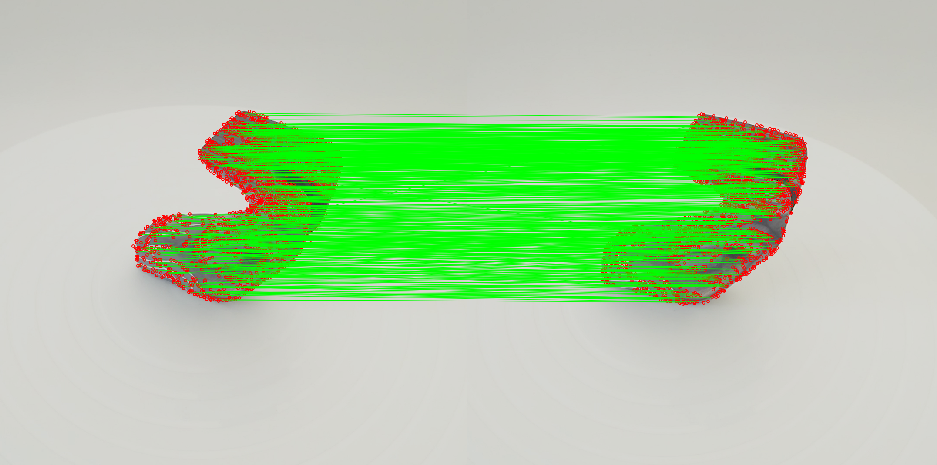
You should have a number of images with a large number of matches that are images just before or after the current image as well as a number of images with a smaller number of matches that are further apart.
Next, we can start the reconstruction itself. This will create a sparse
point cloud based on the features extracted and matched. In the Reconstruction
menu, select Start Reconstruction.
You will get a preview updated in real time of the computed position of each image and of your 3D object.
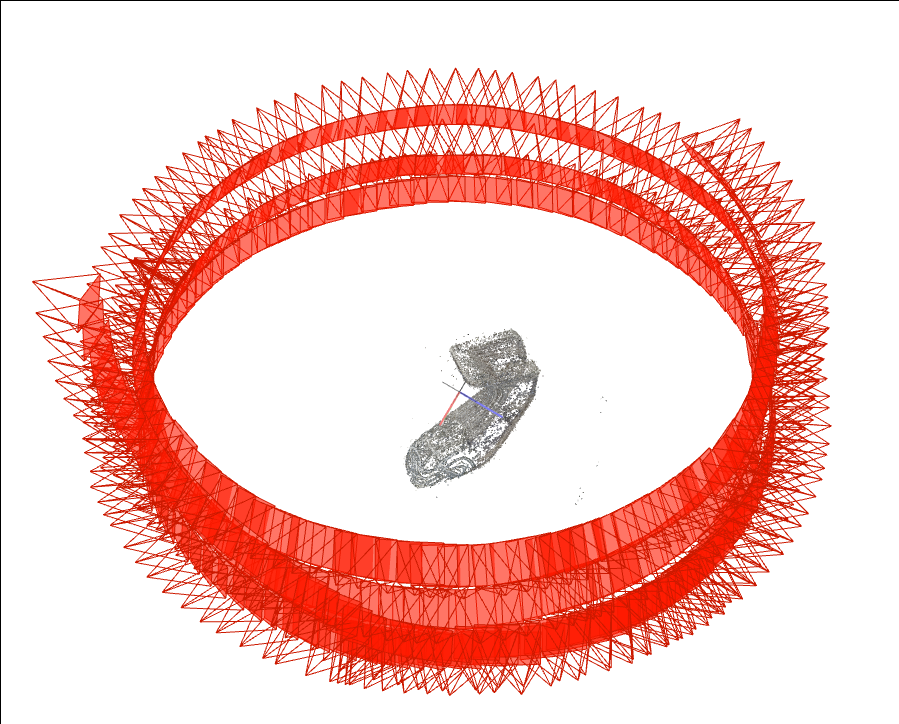
This process will take around 10 minutes.
Once the reconstruction finished, we can export the model in the File menu,
Export model as .... We will export the model in the nvm format that
will be used in openMVS for the next stages.
We should have the following structure at this stage.
├── custom_bowgrip.db
├── custom_bowgrip.ini
├── images
│   ├── img_00001.png
│   ├── ...
├── images_raw
│   ├── img_00001.png
│   ├── ...
├── models
│   └── custom_bowgrip.nvm
└── video
    └── VID_20200415_103955.mp4
Importing into openMVS
We need the different executables that we compiled in the prerequisite. You
can either copy them in the current project directory or add them in our
PATH.
The first step in openMVS is to generate the necessary files for the following stages.
First, to reduce clutter, we will post-process the nvm file to fix the
path as to allow execution in the same place for every tool. We will do
this using perl.
$ perl -pi -e 's{^img}{images/img}' models/custom_bowgrip.nvm
Once the file is fixed, we can let openMVS generate what it needs based on the images and the exported model.
$ ./openMVS/InterfaceVisualSFM -i models/custom_bowgrip.nvm
This will take around 10 seconds and generate a new model as well as a directory of undistorted images matching the geometry of the computed model. We should have the following structure at this point:
├── custom_bowgrip.db
├── custom_bowgrip.ini
├── InterfaceVisualSFM-2004171142368C5D3E.log
├── images
│   ├── 00000.png
│   ├── ...
├── images_raw
│   ├── 00000.png
│   ├── ...
├── models
│   ├── custom_bowgrip.mvs
│   └── custom_bowgrip.nvm
├── openMVS
│   ├── DensifyPointCloud
│   ├── InterfaceCOLMAP
│   ├── InterfaceVisualSFM
│   ├── ReconstructMesh
│   ├── RefineMesh
│   ├── TextureMesh
│   └── Viewer
├── undistorted_images
│   ├── 00000.png
│   ├── ...
└── video
    └── VID_20200415_103955.mp4
Building a Mesh
The next stage is building the dense point cloud. This step will take some time, around 40 minutes on my computer.
$ ./openMVS/DensifyPointCloud -i models/custom_bowgrip.mvs
Once the operation is finished, a new dense point model will be available
in the models directory.
You can preview the result using the openMVS Viewer.
$ ./openMVS/Viewer models/custom_bowgrip_dense.mvs
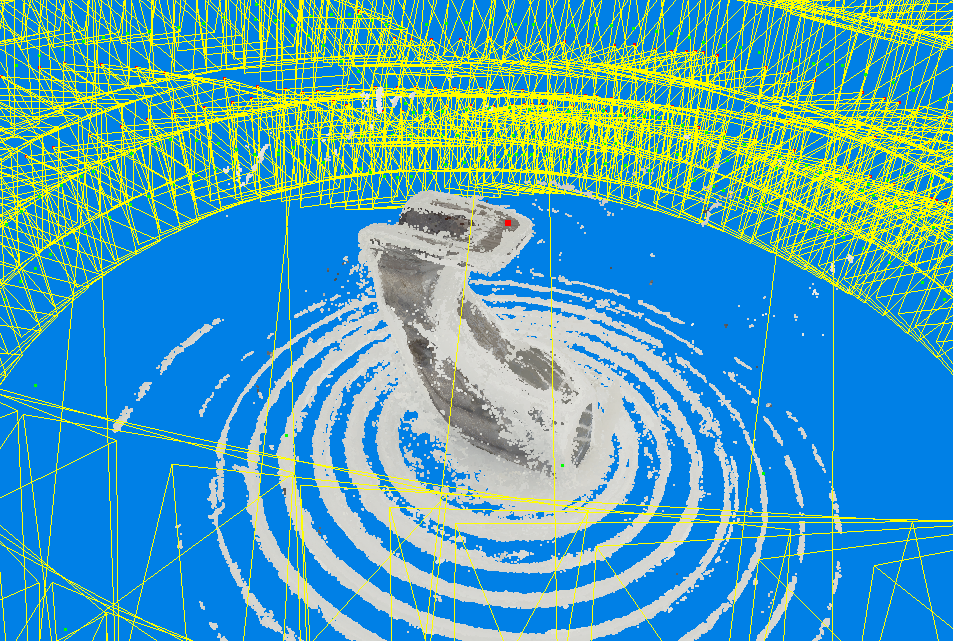
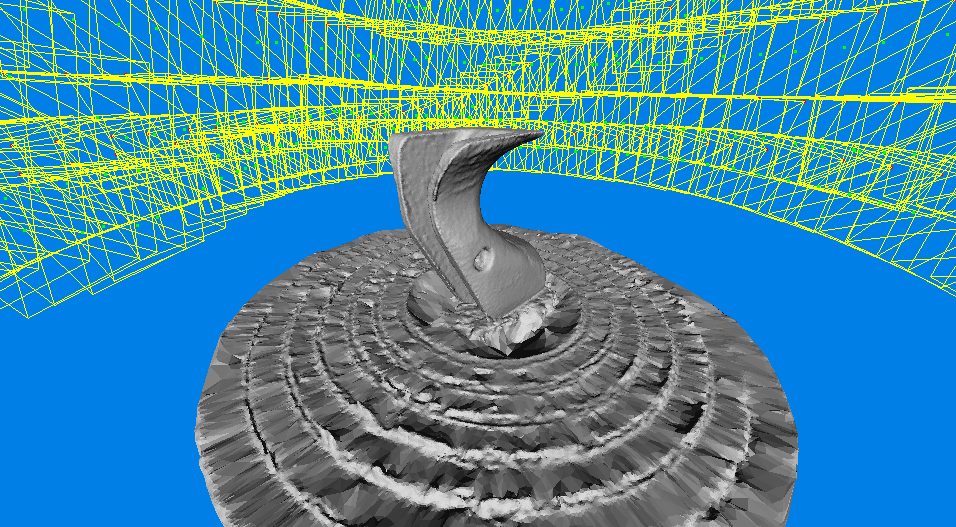
The next step is to reconstruct a mesh based on the points. Without this step, our object is still a cloud of points and not a solid object. This will take approximately one minute.
$ ./openMVS/ReconstructMesh models/custom_bowgrip_dense.mvs
Once the operation is finished, a new mesh model will be available in the models
directory. You can preview the result using the openMVS Viewer.
../openMVS/Viewer models/custom_bowgrip_dense_mesh.mvs
Cleanup
The mesh model can now be imported into your 3D program of choice for cleanup.
This is by far the step that will take the most time and will largely depend on your skills with Blender or your 3D tool of choice.
As the reconstruction has no orientation reference, you need to rotate the object into the correct position and scale it based on reference points and measures that you can find on the object. In the case of the bow grip, I used the total height and the width of the bow groove but this may vary for other scans.
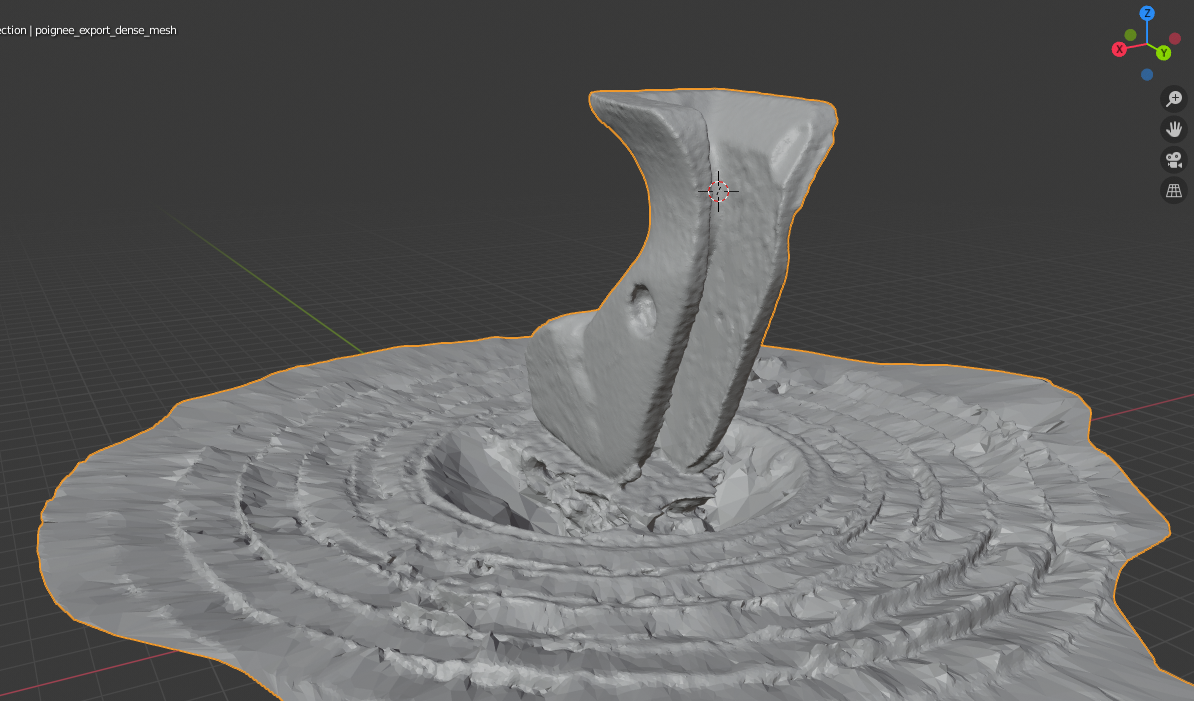
You will want to remove the turntable if it was reconstructed, delete points or polygons that are not attached to your objects, flatten some parts of the model and fix some details up before printing it.
Once you have a clean model, you can start applying other modifications, such as adding or removing matter at some places you think will improve the comfort of the grip or your hand’s position on the grip. Having a digital model of your grip allows you to more easily experiment and try out new things and positions knowing that you can 3D print new grips and revert back to older forms if needed.
